
| Type | Name | Support |
|---|---|---|
| Windows | Windows Server 2000 | Limited |
| Windows | Windows Server 2003 | Limited |
| Windows | Windows Server 2008 | Full |
| Windows | Windows Server 2008 R2 | Full |
| Windows | Windows Server 2012 | Full |
| Windows | Windows Server 2012 R2 | Full |
| Windows | Windows Server 2016 | Full |
| Windows | Windows Server 2019 | Full |
Support for Unix scans on the following verified platforms:
| Type | Name |
|---|---|
| Unix | Debian GNU/Linux 8 (jessie) |
| Unix | Debian GNU/Linux 9 (stretch) |
| Unix | Oracle Linux Server release 6.9 |
| Unix | Oracle Linux Server 7.5 |
| Unix | Red Hat Enterprise Linux Server release 6.7 (Santiago) |
| Unix | Red Hat Enterprise Linux Server 7.5 (Maipo) |
| Unix | Ubuntu 14.04.5 LTS, Trusty Tahr |
| Unix | Ubuntu 16.04.5 LTS (Xenial Xerus) |
| Unix | Ubuntu 18.04.1 LTS (Bionic Beaver) |
| Unix | SUSE Linux Enterprise Server 12 SP3 |
| Unix | SUSE Linux Enterprise Server 15 |
OpsAI supports the newest version of major browsers including Chrome and Firefox on Windows, and Chrome, Firefox and Safari on MacOS. Minimum required screen size is 1280 x 960 pixels.
However, Microsoft Edge is not a supported browser as Microsoft has publicly stated here here that they are switching to the Chromium Engine.
Pre requisites for installing and configuring OpsAI Scanner
The OpsAI scanner runs under a Service or User account. This account must have the following permissions granted in order to scan servers:
Scanner security recommendations:
Always run OpsAI scanner with an account that has limited AD privileges – make sure the OpsAI scanner is not being executed as Domain Administrator or any other high privileged AD user. It is highly recommended to enforce a strong password policy for the Domain account that is configured in the OpsAI Scanner and ensure that the host running the scanner is monitored for security incidents.
Turn on the “Account is sensitive and cannot be delegated” AD account attribute to prevent delegation attacks using the OpsAI Service or User Account.
Disable Unconstrained Kerberos delegation for machines/accounts when possible.
Monitor all machines with Unconstrained Kerberos delegation enabled for security incidents and treat them as a part of the high risk infrastructure.
Monitor actions performed by the account configured in the OpsAI Scanner, e.g., create alerts for suspicious activity (RDP connections, AD User/Group manipulation).
Only allow WinRM connections coming from trusted hosts – can be implemented either via firewall rule or adding hosts to TrustedHostsList.
How these permissions are granted vary from company to company. It is recommended that customers use a delegation model to grant the least amount of privileges to OpsAI Scanner.
The delegation model chosen should consider that new servers are added over time, and as a consequence should grant the least amount of privileges to those new servers. If not, new servers will appear as “Access Denied” on the OpsAI scanner status page.
If no delegation model exist, a way to grant permissions would be to create an “OpsAI Service Accounts” security group, add the OpsAI Service or User Account to the group and use a GPO to add the group to “Local Administrators” group on all servers. This approach violates the least amount of privileges principle.
Servers running OpsAI scanners must be considered as “Secure Administrative Hosts” and should be configured accordingly. Please refer to Microsoft “Implementing Secure Administrative Hosts” article.
Administrative credentials to the servers that will be scanned:
You can check the group memberships of the scanner account like this:
HTTPS TCP Port 443 over SSL from OpsAI scanner Windows server to:
https://scan.opsai.com OpsAI is an agentless scanner that uses WMI and WinRM to gather data. Both services are widely used in server environments and they can be adjusted to only allow granular access to certain objects and commands. If these services are not used and it is necessary to open for these services in the network, access should only be granted between the scanner server and the servers to be scanned, by implementing specific firewall rules explicitly stating the rules described below.
WMI:
Get-WmiObject -Class Win32_Service -ComputerName 10.0.0.1 [Microsoft.Win32.RegistryKey]::OpenRemoteBaseKey(-2147483646, 10.35.11.207) RPC inspect:
WinRM (Remote PowerShell):
Example:
Test-WSMan 10.0.0.1 SSH::
Sign in to the organization portal at OpsAI.com, and navigate to the Scanner page. Click the download scanner button.
Enable PSRemoting remotely
foreach ($Server in $Servers) {
Write-host "Updating WinRM on $Server" -fore green;
$exp = "C:\Temp\PsExec.exe -nobanner -d \\$($Server.Trim()) -s powershell Enable-PSRemoting -Force";
Invoke-Expression $exp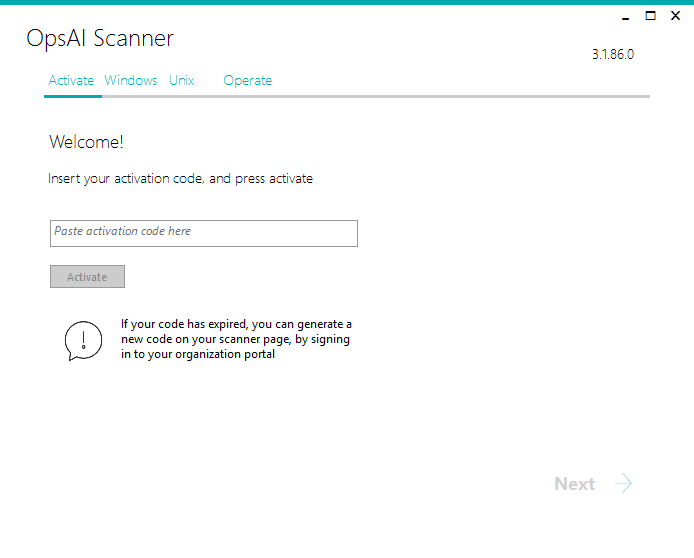
}Activation Code:
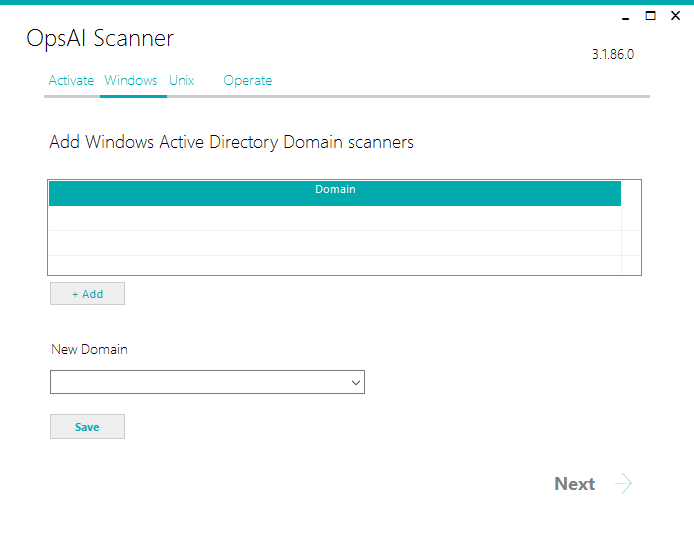
Press the “Add button” and select the Active Directory domains that should be scanned from the list. Once all desired domains have been configured, click “Next”
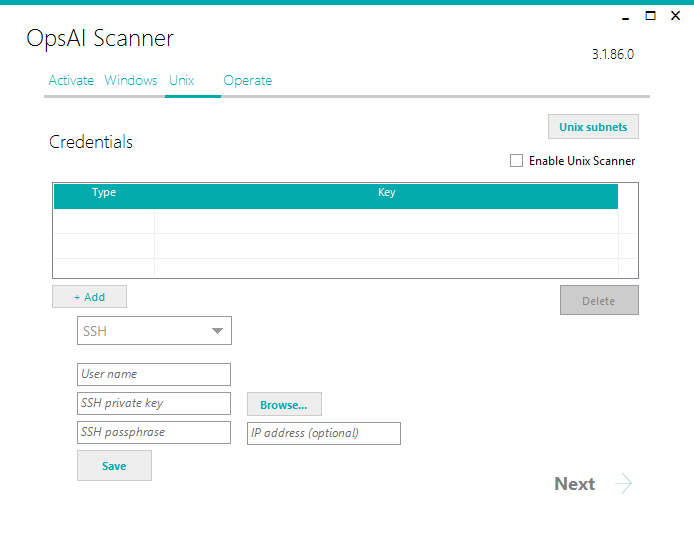
On the Unix tab, select “Enable Unix Scanner” if you want to scan Linux or Unix servers.
Please note that Linux or Unix scanning requires that the NMap (https://nmap.org/) tool is installed on same server as the OpsAI Scanner.
You must add Unix Credentials on the Unix tab: You can add general (global) User and SSH credentials or credentials per machine (IP address)
Please add these entries to /etc/sudoers, so OpsAI scanner may execute dmidecode and service commands as a privileged user (replace “linuxuser” with the actual Unix user name used by the scanner):
Cmnd_Alias DMIDECODE = sudo dmidecode -t system|grep -E ‘(Manufacturer|Product Name|UUID)’
Cmnd_Alias SERVICE = sudo service –status-all 2>/dev/null
linuxuser ALL=(root) NOPASSPWD: DMIDECODE
linuxuser ALL=(root) NOPASSPWD: SERVICE
The private key file used with SSH credentials supports RSA and DSA private key in both OpenSSH and ssh.com format. If the file has a Subject: header, you must remove it.
Sample of a valid file:
-----BEGIN RSA PRIVATE KEY-----
Proc-Type: 4,ENCRYPTED DEK-Info: DES-EDE3-CBC,DD06FC017B349484 lGoF/TTnsMoRpxDiFInQQIB/LcdKElaEkf6g14c6MiLj2s18eNmbEFvkb0tt/69PaVRxULQJjp9yjhn1Utcq8LnEHZ6P6LpzV9f6TWA+8qiBFjfbKulXdfTHLxqGNdq5
…more lines
jihdzRM/vTqMLszqjgJ7y5uAnQ6U/vcD/gfud1MTd2jJKtlrel+xNQ==
-----END RSA PRIVATE KEY-----
Federal Information Processing Standards must be disabled on the OpsAI Scanner Windows server for Unix scanning to succeed.
See https://blogs.technet.microsoft.com/secguide/2014/04/07/why-were-not-recommending-fips-mode-anymore/
Optionally, you can exclude individual servers from scanning. Create a txt file with either a computer name or IP address per line, and add it to the scanner via the “Exclusions” button. Notice that Windows servers that have been discovered and then removed from Active Directory will be automatically excluded from scanning.
Usually, it is not necessary to change any settings in opsai.exe.config, but some of the settings may need changes based on special customer needs. The settings file (opsai.exe.config) is located in the “C:\program Files\OpsAI\Scanner” folder. To change any setting, open the file in Notepad and modify as required.
The following settings could be changed due to customer requirements:
MaxDop indicates the number of concurrently scanned machines. You can change the MaxDop default value of 4 to a higher value if you have a powerful machine (for example to 8 or 12 concurrent threads).
The RunnerTimeoutInSeconds value can be altered if you have a network with high latency and a number of servers remain in WMI status Unclassified.
The WmiTimeoutInSeconds value can be altered if you have a network with high latency and a number of servers remain in WMI status “Partial Data” and you see WMI timeout errors in the Troubleshoot tab for the server.
Use the following link as an Azure AD admin that would like to connect a tenant to the OpsAI Cloud Connector:
https://login.microsoftonline.com/common/adminconsent?client_id=d0ef5253-a9c7-4778-b027-1b2270c0825d
You can verify the registration in your Azure AD under “Enterprise Applications” – you can locate “OpsAI Cloud Connector” there.
Before the connector can scan subscriptions in the customer tenant, the customer needs to add the app registration as a subscription reader.
To give the app registration permission to read subscriptions, do the following in the customer Azure portal:
(Alternatively, this can also be done using Management Groups)
Finally, contact OpsAI support with your Azure AD “directory id” (tenant id), and subscription id(s).
The purpose of this feature is to scan SQL Server instances and user databases to evaluate if they can be migrated to Azure SQL DB Managed Instance.
In order to use this feature perform the following steps:
The Windows account used for running the assesments must be granted the following rights (for SQL Server 2014 and later, otherwise sa rights are required) :
GRANT CONNECT SQL TO [MyDomain\dma_user]
GO
GRANT CONNECT ANY DATABASE TO [MyDomain\dma_user]
GO
GRANT VIEW SERVER STATE TO [MyDomain\dma_user]
GO
GRANT VIEW ANY DEFINITION TO [MyDomain\dma_user]
GO
Notice that these rights does not enable the account to access any data in the user databases on the SQL Server instance (for SQL Server 2014 and later).
You can use the filtering features of the server list to only display servers that are “obsolete”, for example servers that have been shut down and decommissioned.
In order to use this feature perform the following steps:
Go to the server list, and add the WMI Status column.
The WMI status can have one of the following values:
Provided the scanner is still running, you can remove it by removing the machine account from Active Directory.
When you create an account and install the OpsAI scanner onto a designated Windows machine, you will be able to see the data collected from the scan on the OpsAI platform.
Dashboard
The Platform’s dashboard gives you an overview of your IT environment. You will be able to view the data collected about your Geo Map, IT Infrastructure, Compliance Ratio, Business Applications, Risk Assessment, Technical Debt, Rightsizing potential and Support.
*Please note: in the demo version of OpsAI only Risk Assessment and Technical Debt data will be available.
Scanner Status
The OpsAI Platform lets you view the status of the scanner and the total amount of assets found and their states. Here you can download the latest version of the OpsAI scanner and generate a new keycode.
Assets
OpsAI gathers data from all your assets and lists in one place for you or you can view them by type. You can multi-select and edit servers, group them into the necessary application groups, filter and view server or application group details.
Cost
In the cost section of OpsAI, you have an overview of the potential cost of your assets when moved to the cloud either mapped 1:1 or Right Sized and based on Cloud provider, region, commitment and licensing.
Settings
As an owner of the OpsAI organization account you can invite, delete or move ADMIN rights to another user and create another organization account if needed. You are also able to download an Excel file of the scanned data.
Of course! We appreciate any feedback you may have about OpsAI. This can easily be done from the Contact section here, or by clicking “Feedback” in the OpsAI platform.
If you have any problems with OpsAI, you can let us know by sending us an email through our website. Go to the Contact section here. We will try our best to fix any problem you may have.
Release 3.2.162, April 24, 2020
Release 3.2.155, March 30, 2020
Release 3.2.129, January 28, 2020
Getting in control of your Technical Debt is simple once you know where it is.
©2020 Cloudeon All rights reserved — CVR/VAT 37 19 61 69